File Management |
Select files from your computer to upload to The Total Program
Download Files from The Total Program to your computer
File Security: Make a Folder Public
Upload Files to the system
1) In the Organization Manager select Files:
![]()
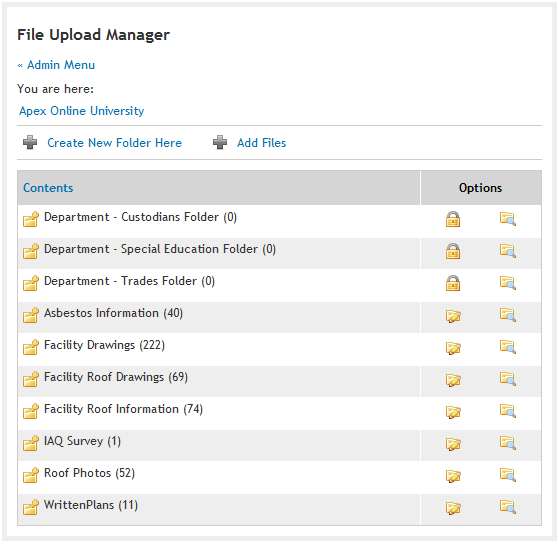
The File Upload Manager appears. The example below shows how the main directory looks with files and folders already created. Note that a Department Folder is automatically created for each Department in your organization.
2) Choose a location in the File Manager where the Files will be uploaded.
Option 1: Add Files to the main directory:
Option 2: Add Files to an existing folder:
- Click on
in the righthand column of the File List.
- Click on
- Click here to ontinue to File Upload Process
Option 3: Create a new folder in which to upload Files:
- Click on
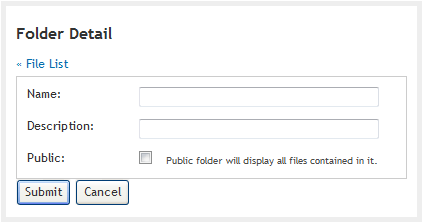
- The Folder Detail page appears...
- Enter the Folder Name, and choose whether to make it public.
Note: If the Folder is public it will be displayed in your File List on your website. If the Files within the Folder contain sensitive data, leave the box unchecked and only Admin users will have access to it.
- Click Submit and the new folder will appear in the File List.
- Click on
- Click on
- Continue to the File Upload Process
File Upload Process
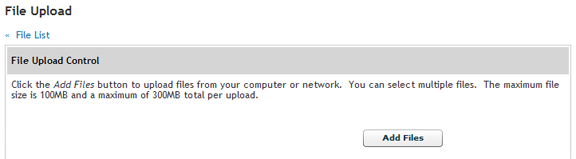
1) On the File Upload page click the 'Add Files' button:
2) Select files from your computer to upload.
A window will open on your computer showing files from your personal computer. Navigate to the location of the files you wish to upload.
Select multiple files at once using following options:
Select multiple files individually:
Hold the CTRL key on your keyboard while clicking on each file. Each file you select should highlight as you click on them. When you have selected all of the files you wish to upload, click the Open button in the bottom right corner of the window.Select a range of files:
Hold the SHIFT key on yourkeyboard and click on the first file in the range. Continue to hold down the SHIFT key as you select the last file in the range. The range of files you selected should be highlighted.Click the Open button in the bottom right corner of the window.
These files will now appear on the File Upload page as shown in the picture below.
Note: The max file size is 100 MB and the max upload size (total of all files) is 300 MB.
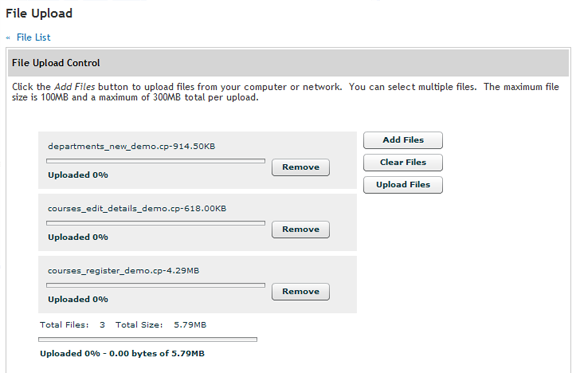
3) (Optional) Review the File Upload queue.
At this point you may want to review the files you are about to upload.
- Remove individual files by clicking 'Remove' next to that file in the list.
- Add additional files by clicking 'Add Files'.
- Clear all files by clicking 'Clear Files'.
4) Click the 'Upload Files' button.
After clicking this button, the files will automatically begin to download. The progress bar below each file indicates the upload status. At the bottom of the list, a progress bar indicates the status of the entire file upload. When the upload is complete the new file directory will open.
Downloading Files
1) In the File Manager click  next to the file you want to download.
Depending on your computers browser settings, you will be given different options on how to manage the download of the file. In general, you have two main options:
Save the file
If you choose to save the file, you can decide where to save it on your computer and choose a new name for the file. You can then open the file with the appropriate program (i.e. MS Word for documents, or MS Excel for spreadsheets). Note: you may receive an error message if your computer does not have the appropriate program to read the file.Open the file
If you choose to Open the file, it will be saved in your browsers specified download directory and open with the appropriate program (i.e. MS Word for documents, or MS Excel for spreadsheets). Note: you may receive an error if your computer does not have the appropriate program to read the file.
Edit File Descriptions
Once a file is uploaded into The Total Program the filename cannot be changed. However, you can add a file description that will be shown instead of the filename. This is useful, especially if the filename is does not effectively describe the file contents.
1) In the File Manager click the  next to the file you want to edit.
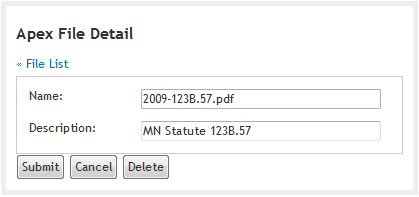
2) In the File Detail page enter a description in the text box and click Submit.
The example below shows how adding a description can make the file name more descriptive and easier to read.
Delete a File:
1) In the File Manager click the next to the file you want to delete.
2) In the File Detail page click the 'Delete' button.
A window will appear asking:
"Are you sure you want to delete this entry?"
to delete the File.
to return to the File List without deleting the file.
Delete a Folder
You can delete a folder, but be aware that deleting a folder also deletes everything that is contained within it.
1) In the File Manager click  next to the folder you want to delete.
2) In the Folder Detail page click the 'Delete' button.
A window will appear asking if you want to delete the folder. Click 'OK'
Another window will appear to reaffirm that you will be deleting all of the contents within the folder as well. Click 'OK'.
File Security: Make a Folder Public
Making a folder public applies to when you link your files to your website. If a folder is made public, anyone viewing your website can download the files within it. If you do not want these files available to the public, disable this option for the folder.
1) In the File Manager click next to the folder.
2) Next to the Public option, check the box to make the folder public.
Note: By default folders you create are not public.
Related Topics:
How to create a File List page on your Home Page
| Back to Top |